第一次接触计算机视觉,决定在Python下使用Opencv库,学习图像处理的同时熟悉Python语法。
Python@3.8 PyCharm with Opencv and numpy
1. 获取视频和播放视频
1 | import cv2 |
- 打开视频接口 :
cv2.Videocapture()创造一个Videiocapture变量, 参数可以是设备索引cv2.VideoCapture(0)或视频文件cv2.VideoCapture("path")。 - 以帧为单位读取显示视频:
1 |
|
—— ——X
|
|
V y
1 | 在Opencv中,坐标表示为(width, height) |
Crop and Resize
图像放缩(任意比例)、图像裁切
1 | img = cv2.imread("Resources/lambo.png") |
画图(线,点,圆,文字)
1 | # SHAPES AND TEXTS |
透视变换(四组点)
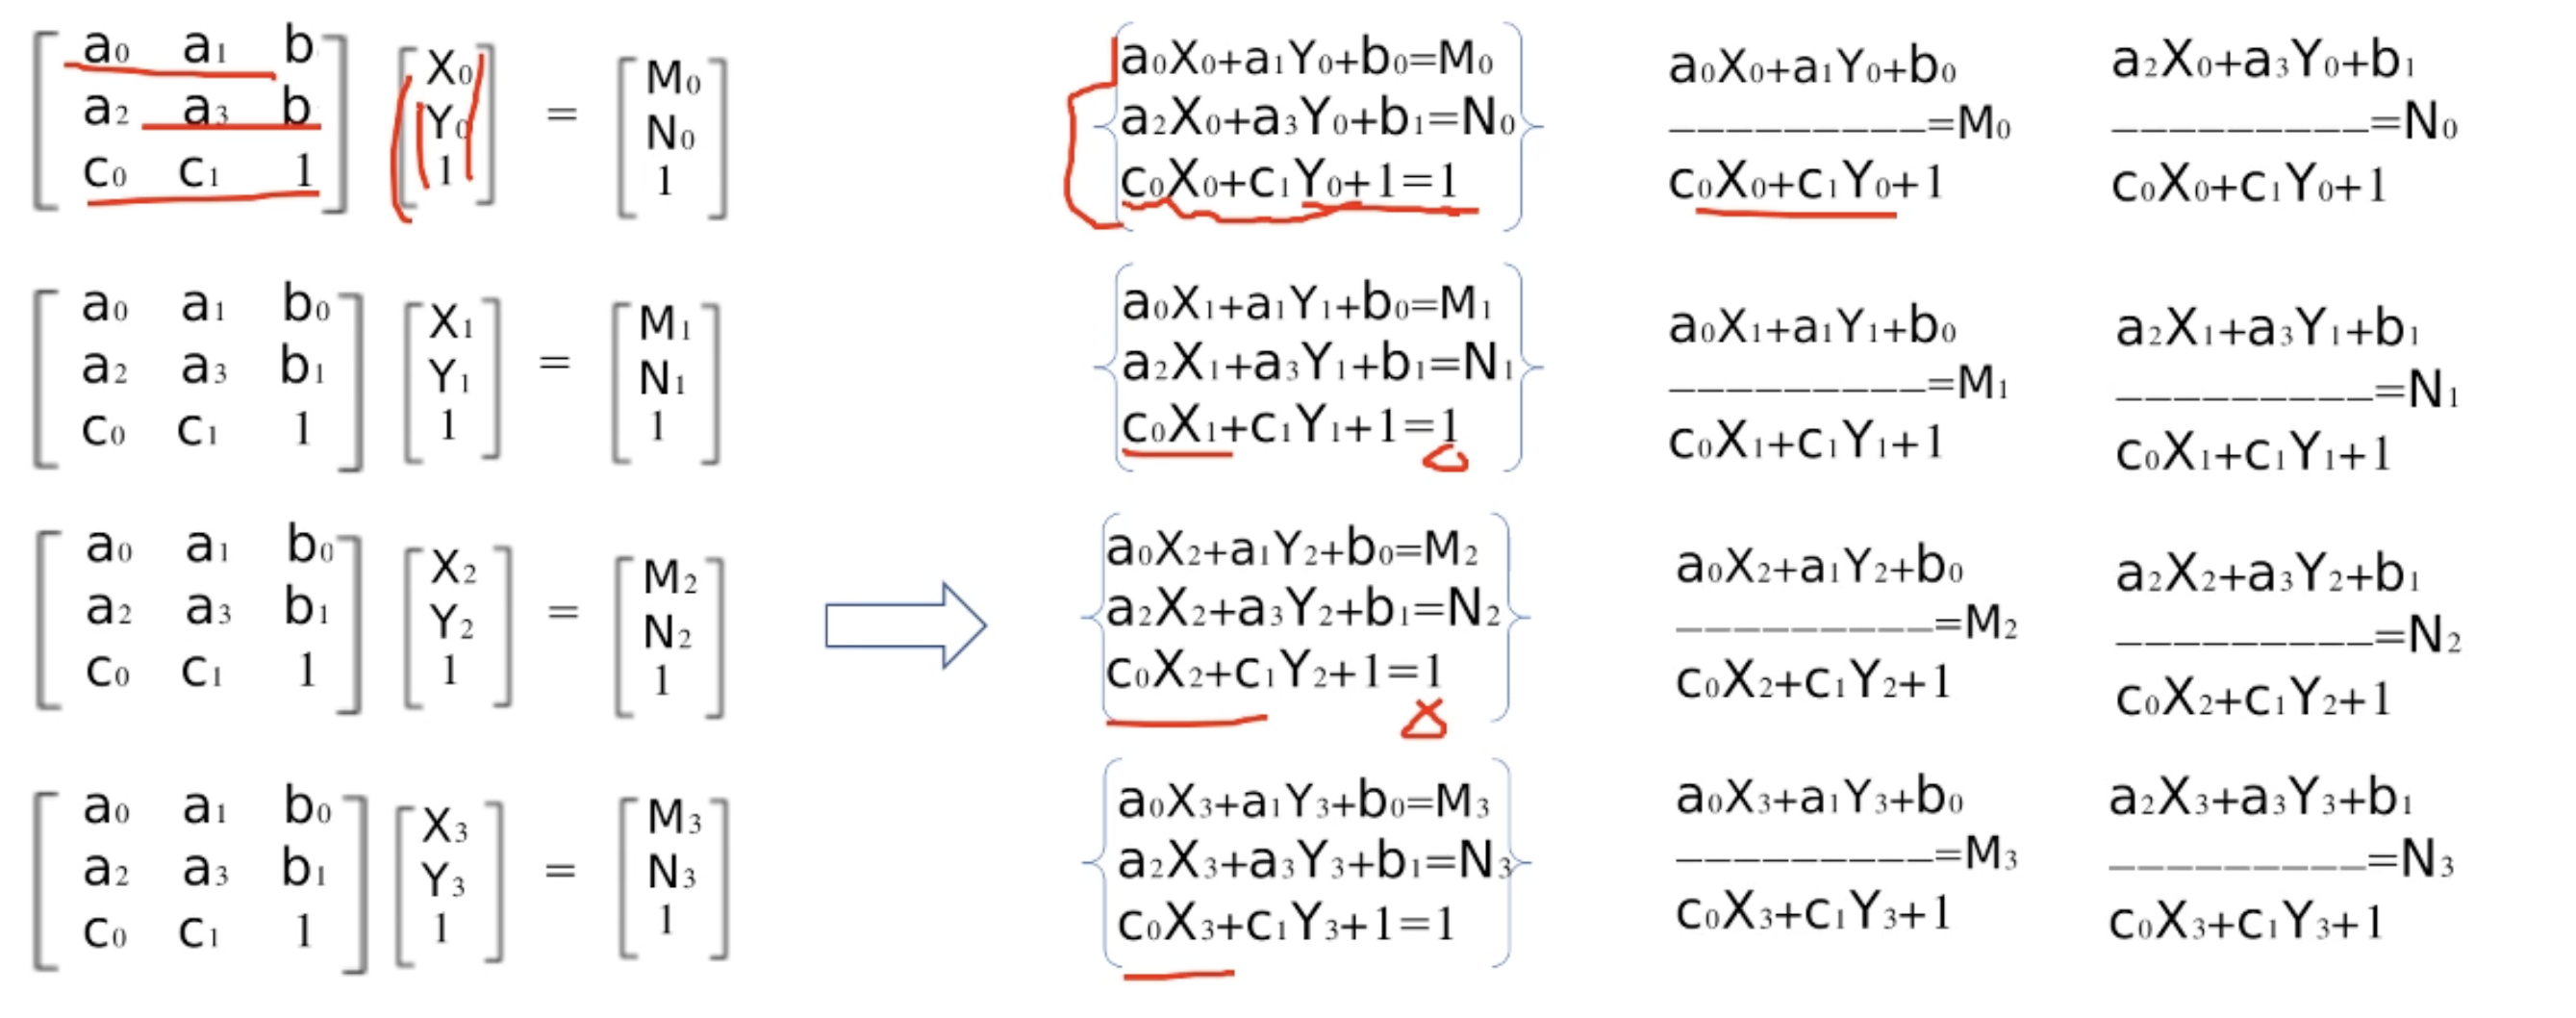
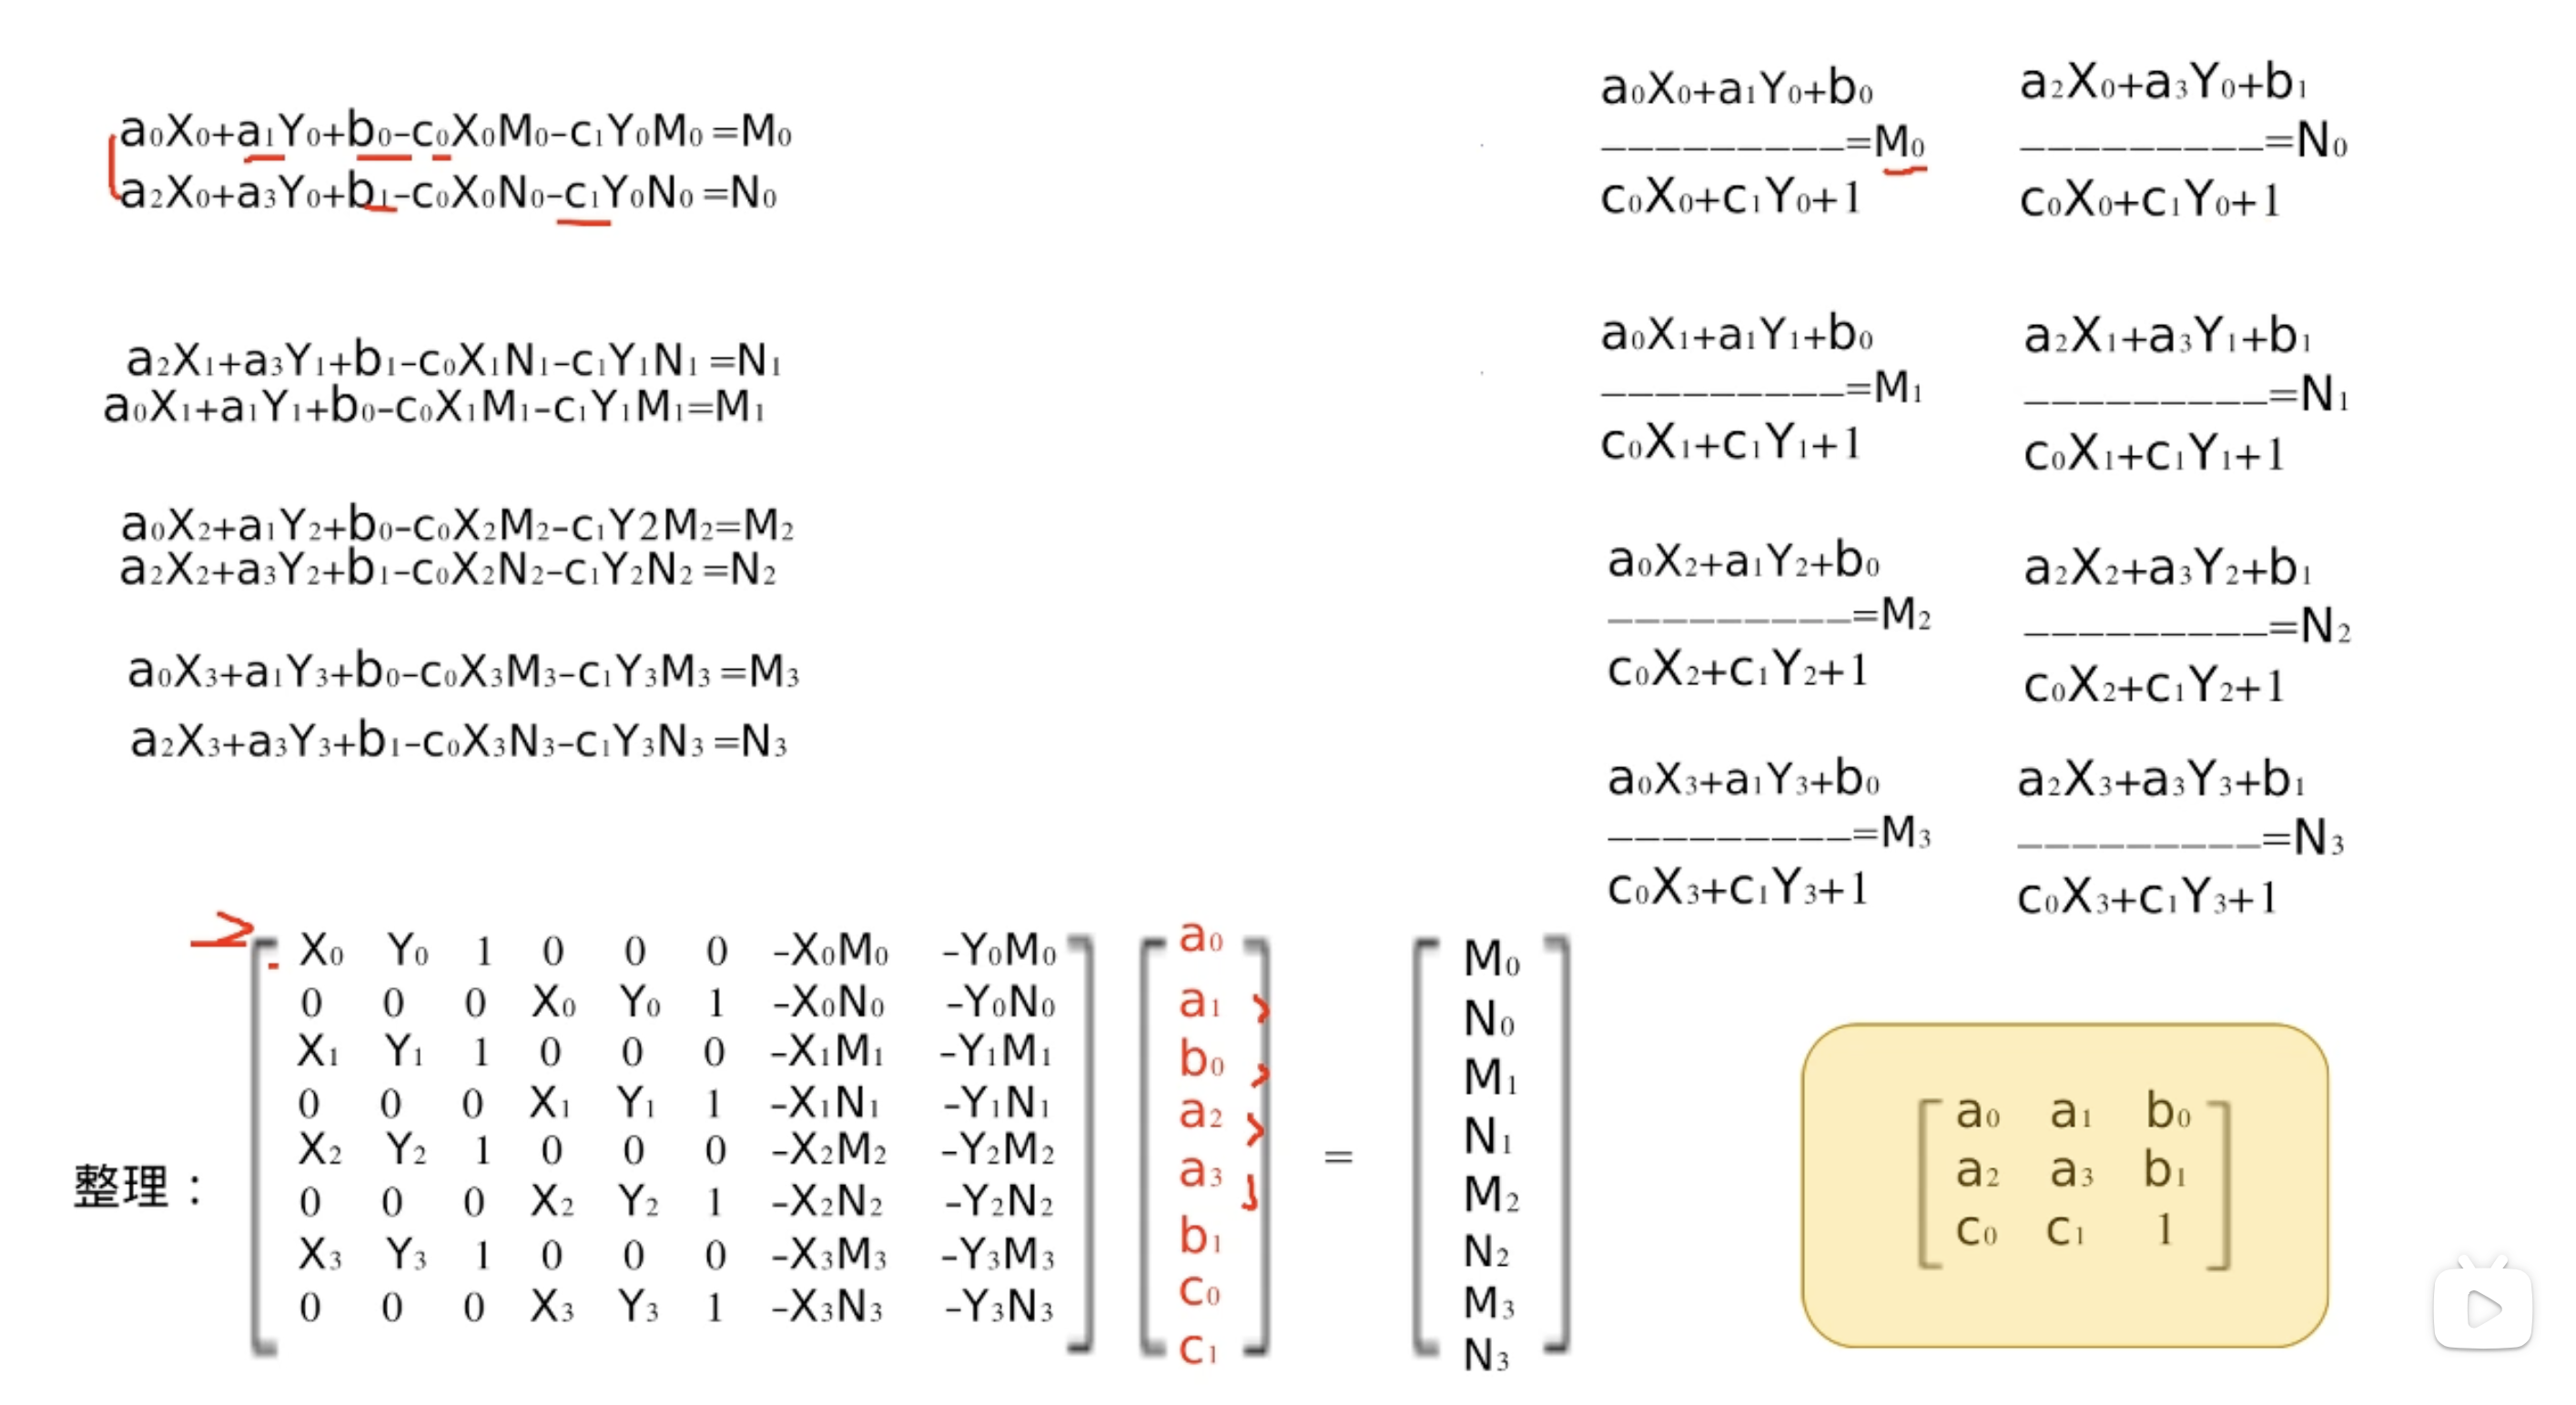
仿射变换(三组) 线性变换
相关线性代数方程原理参EssenceofLinearAlgbra
1 | # WRAP PERSPECTIVE |